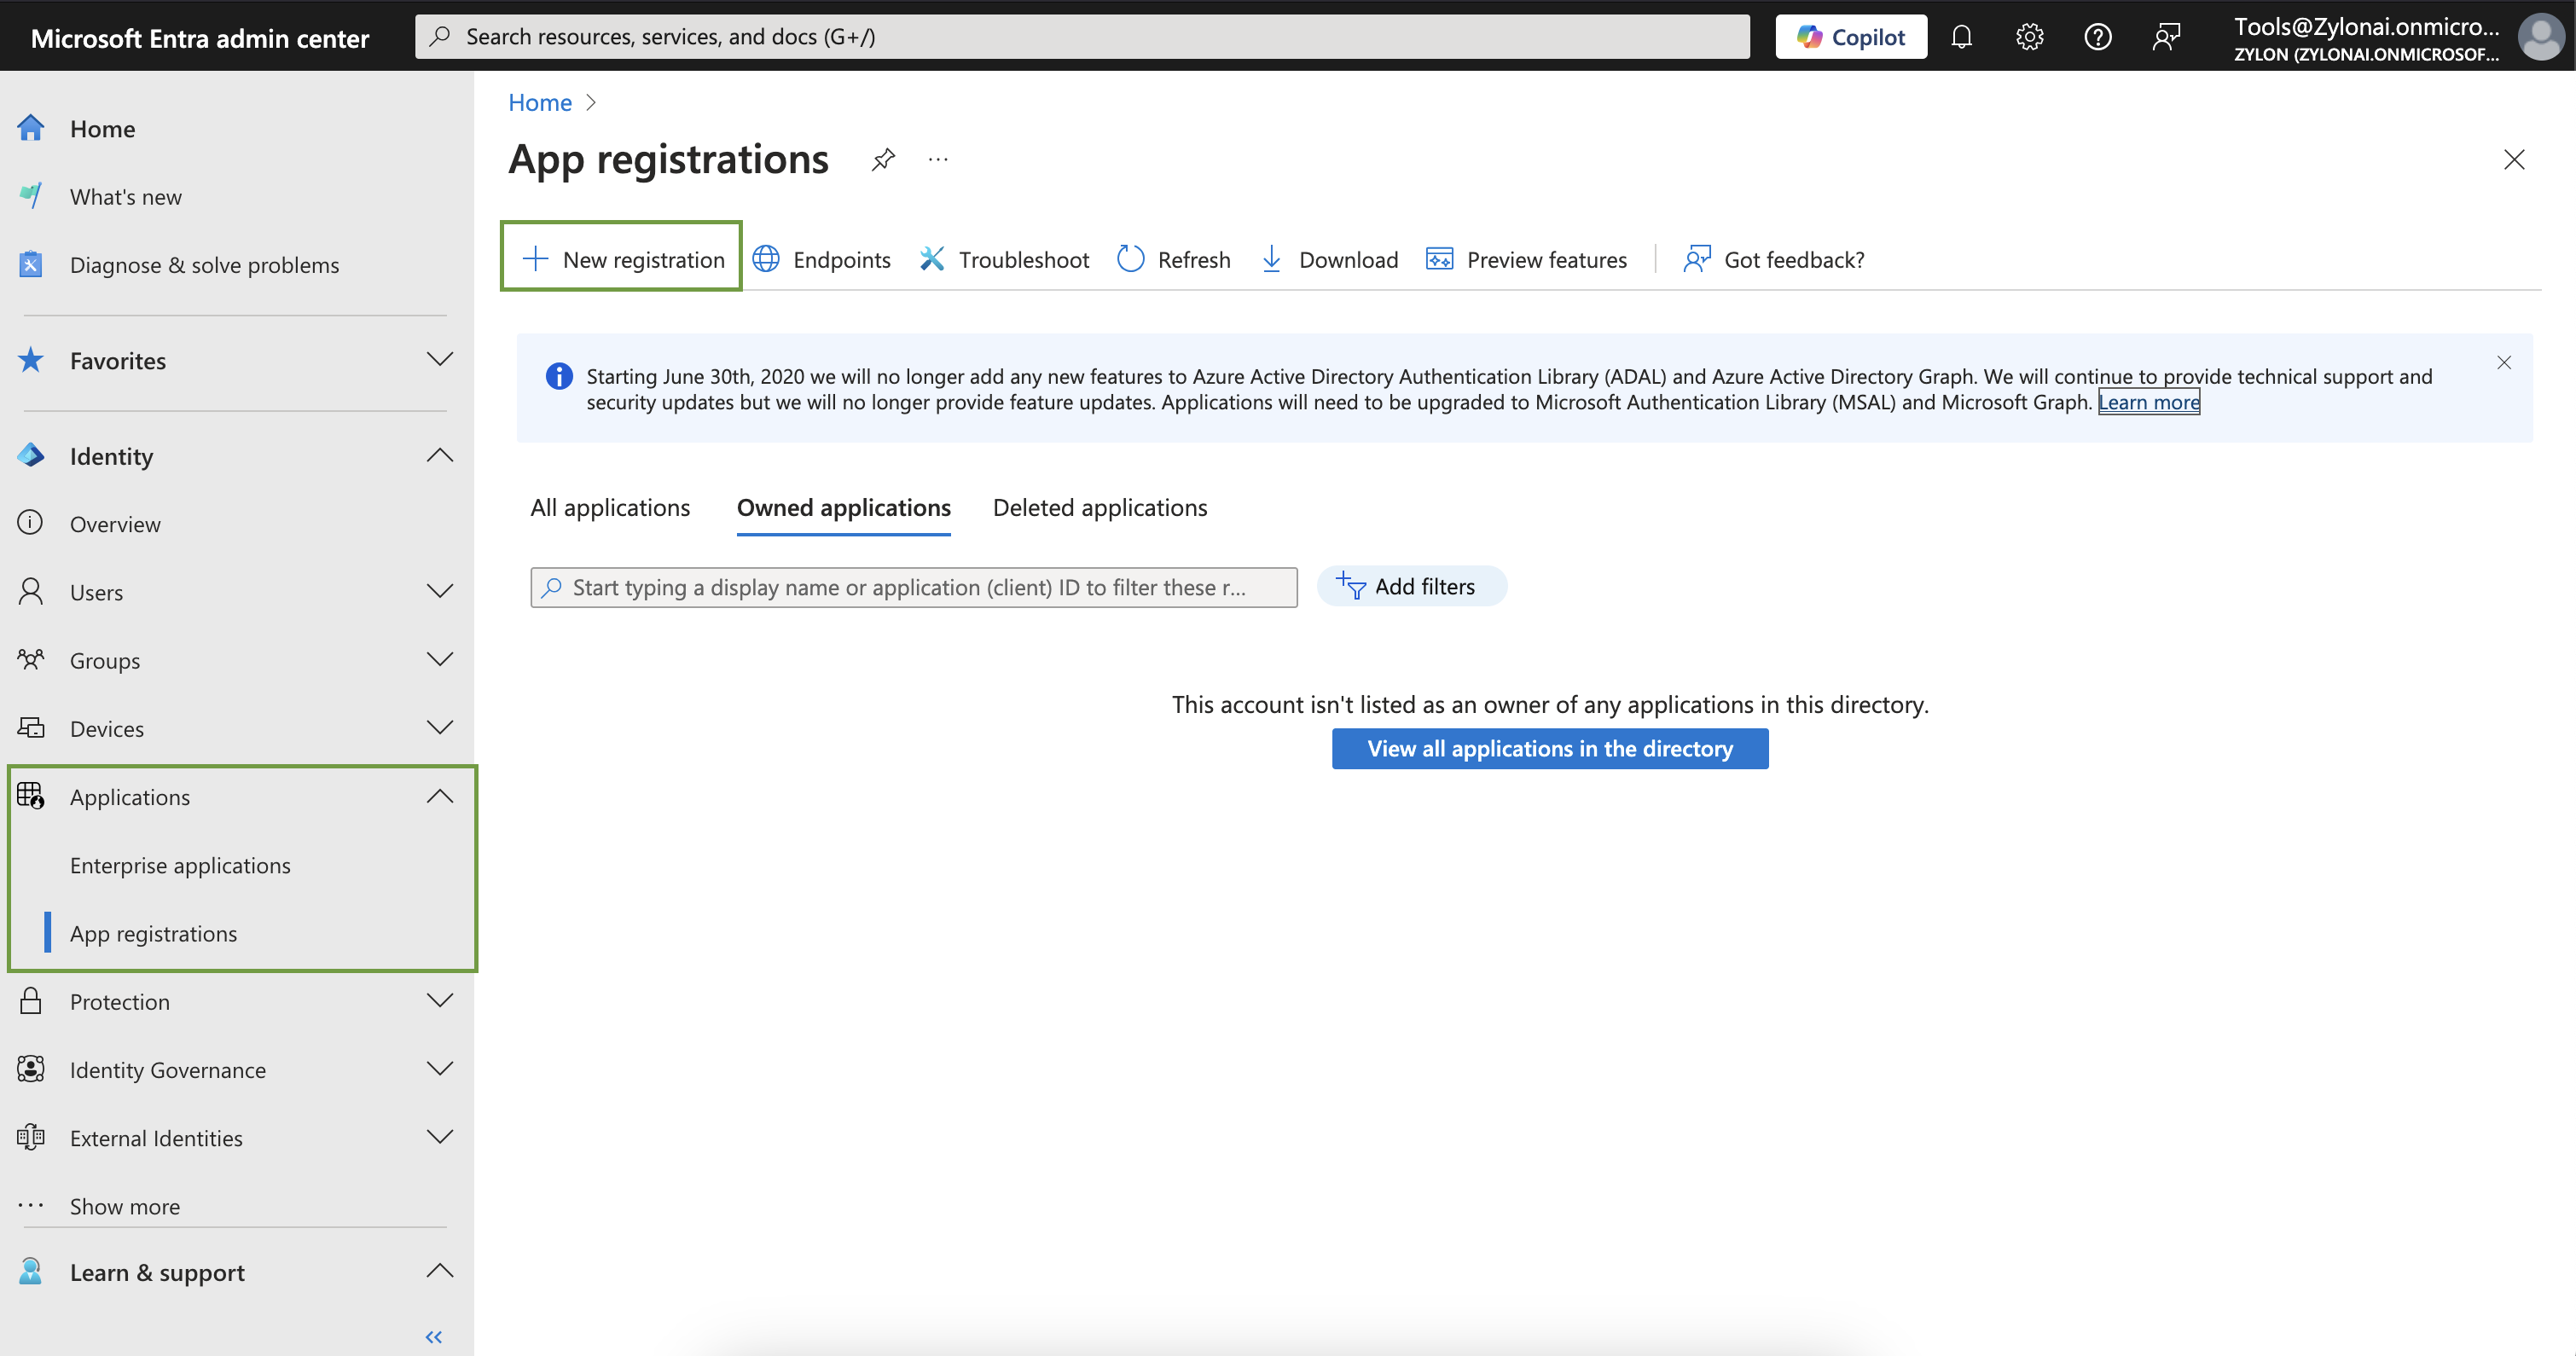
Create a Microsoft Entra app
First you need a Microsoft Entra application. We recommend to use a non-personal account to create this from the Microsoft Entra panel. This account does not need to have access to any items on SharePoint but has the right permissions to setup the app that will serve as a bridge between Zylon and SharePoint.- Go to https://entra.microsoft.com.
Applications → App Registrations → New Registration
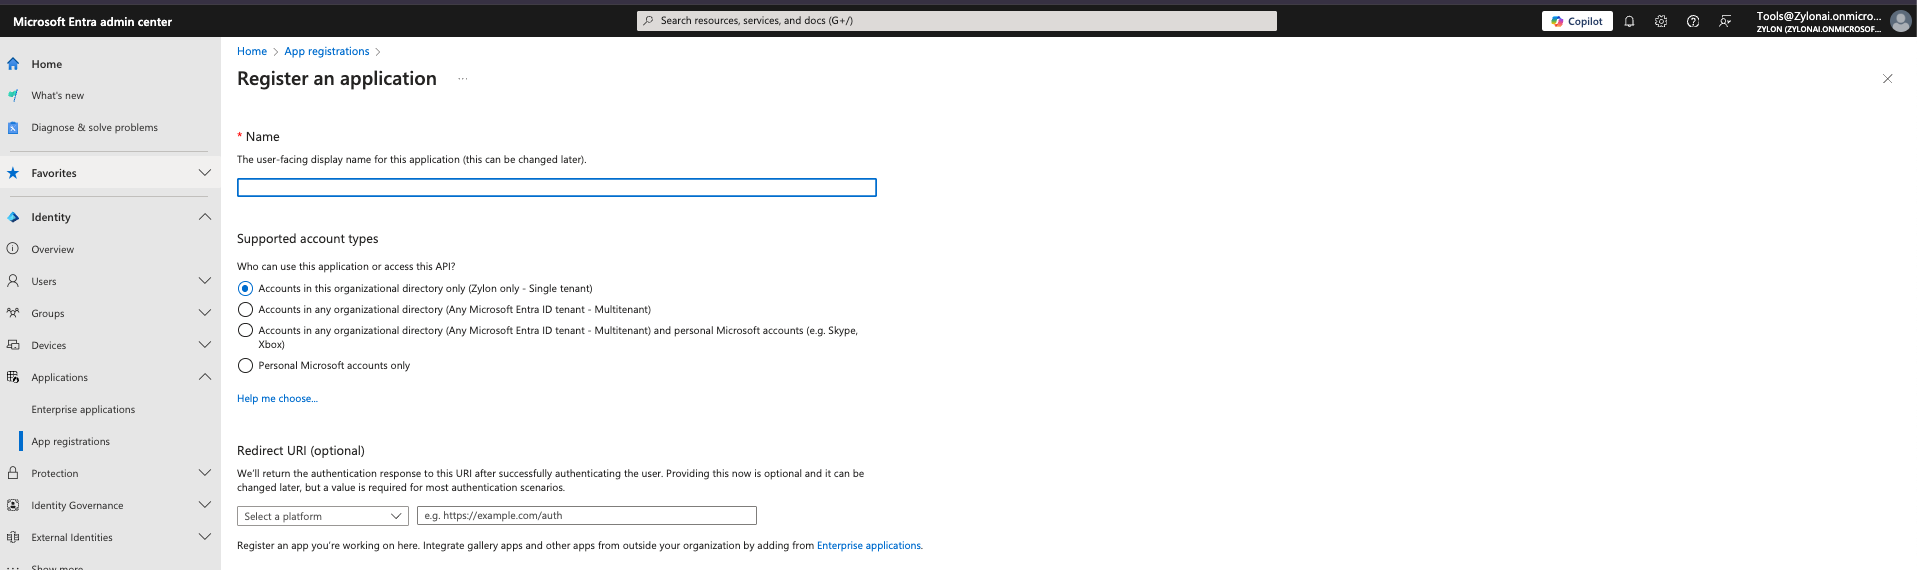
- Provide a meaningful name for the Application.
- On Supported Account types choose
Accounts in this organizational directory only - Under
Redirect URI→ SelectWeband add the followings redirect URL
- Click
Register
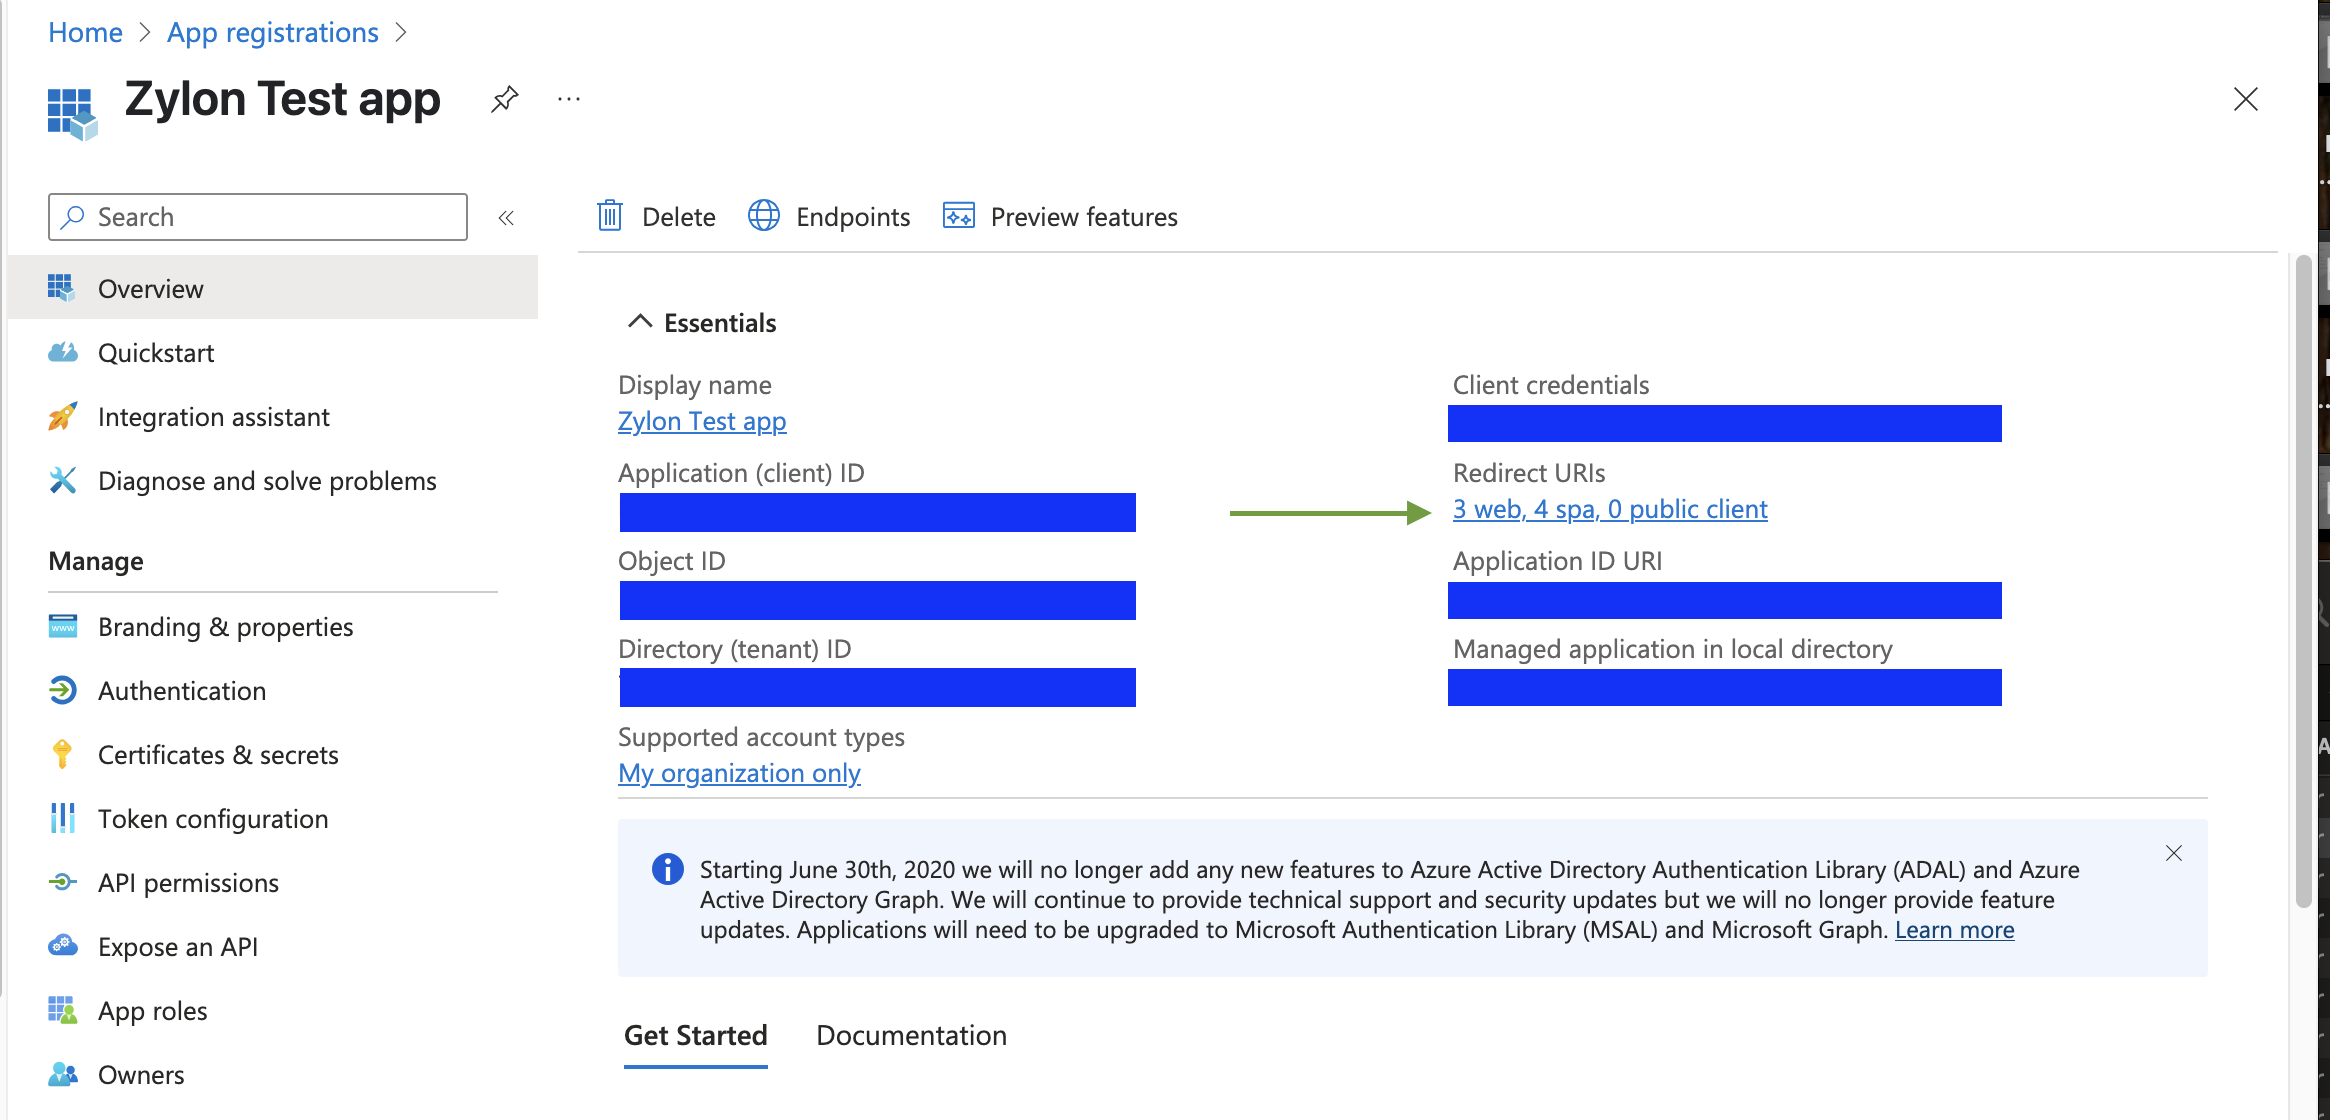
- Click on
Redirect URIs
- Click on
Add a platform
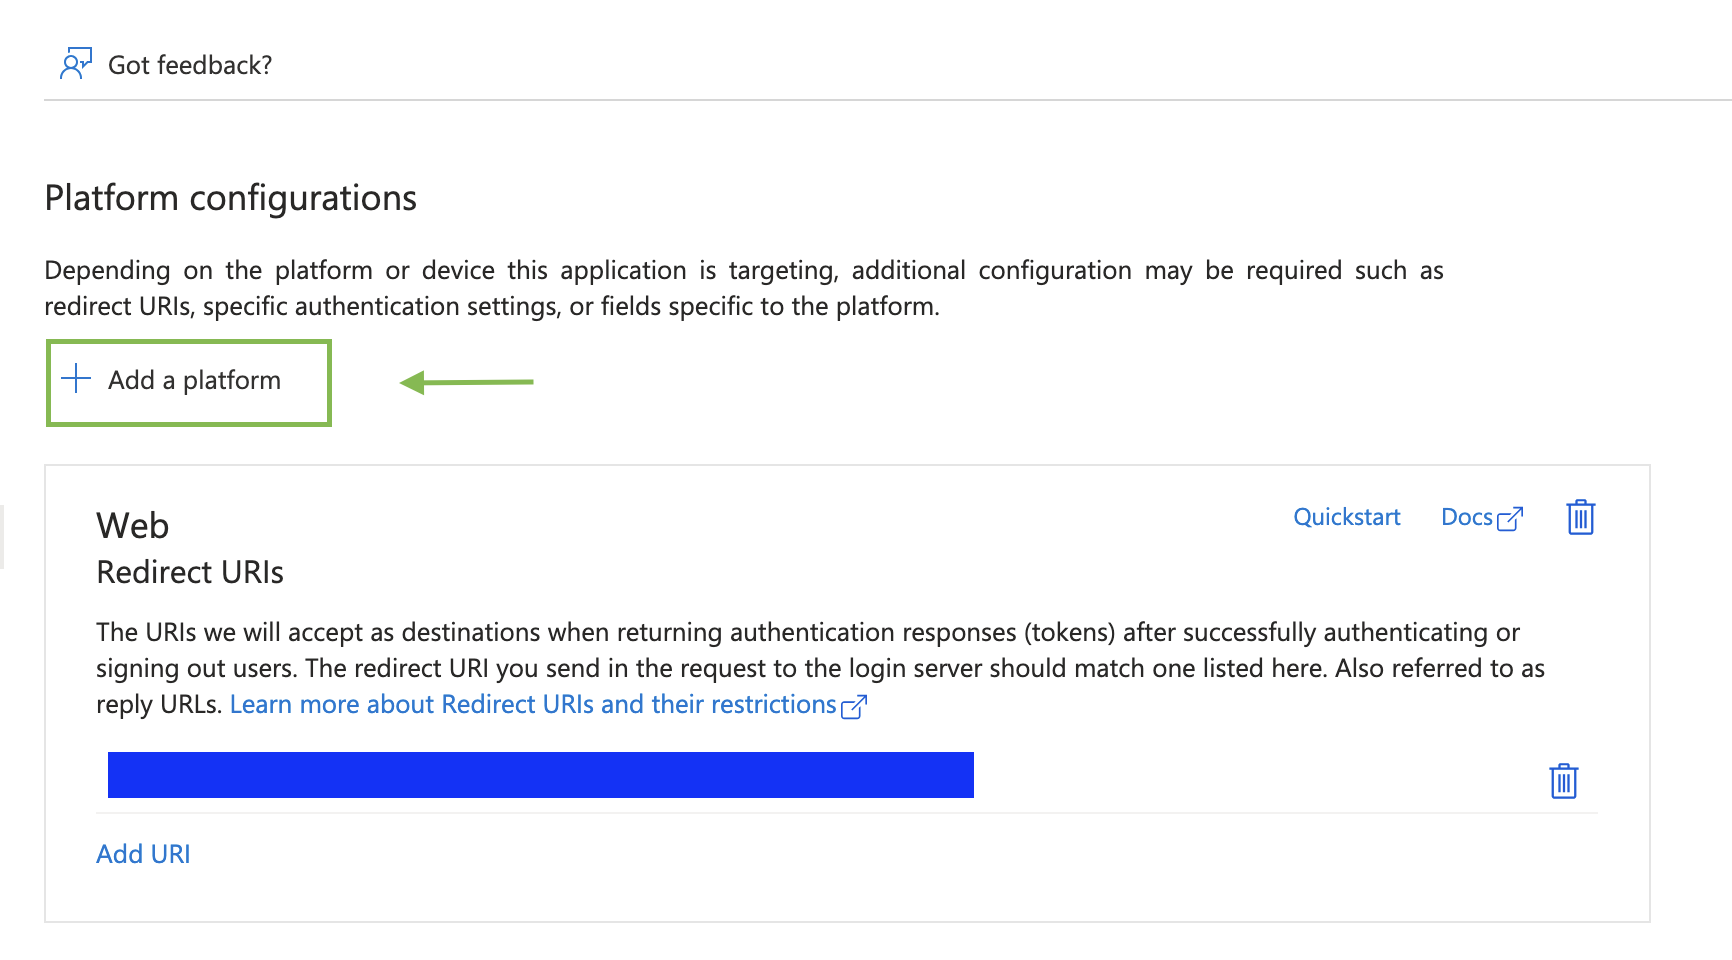
- Click on
Single-Page application

- Add the following URL and click
Configure:
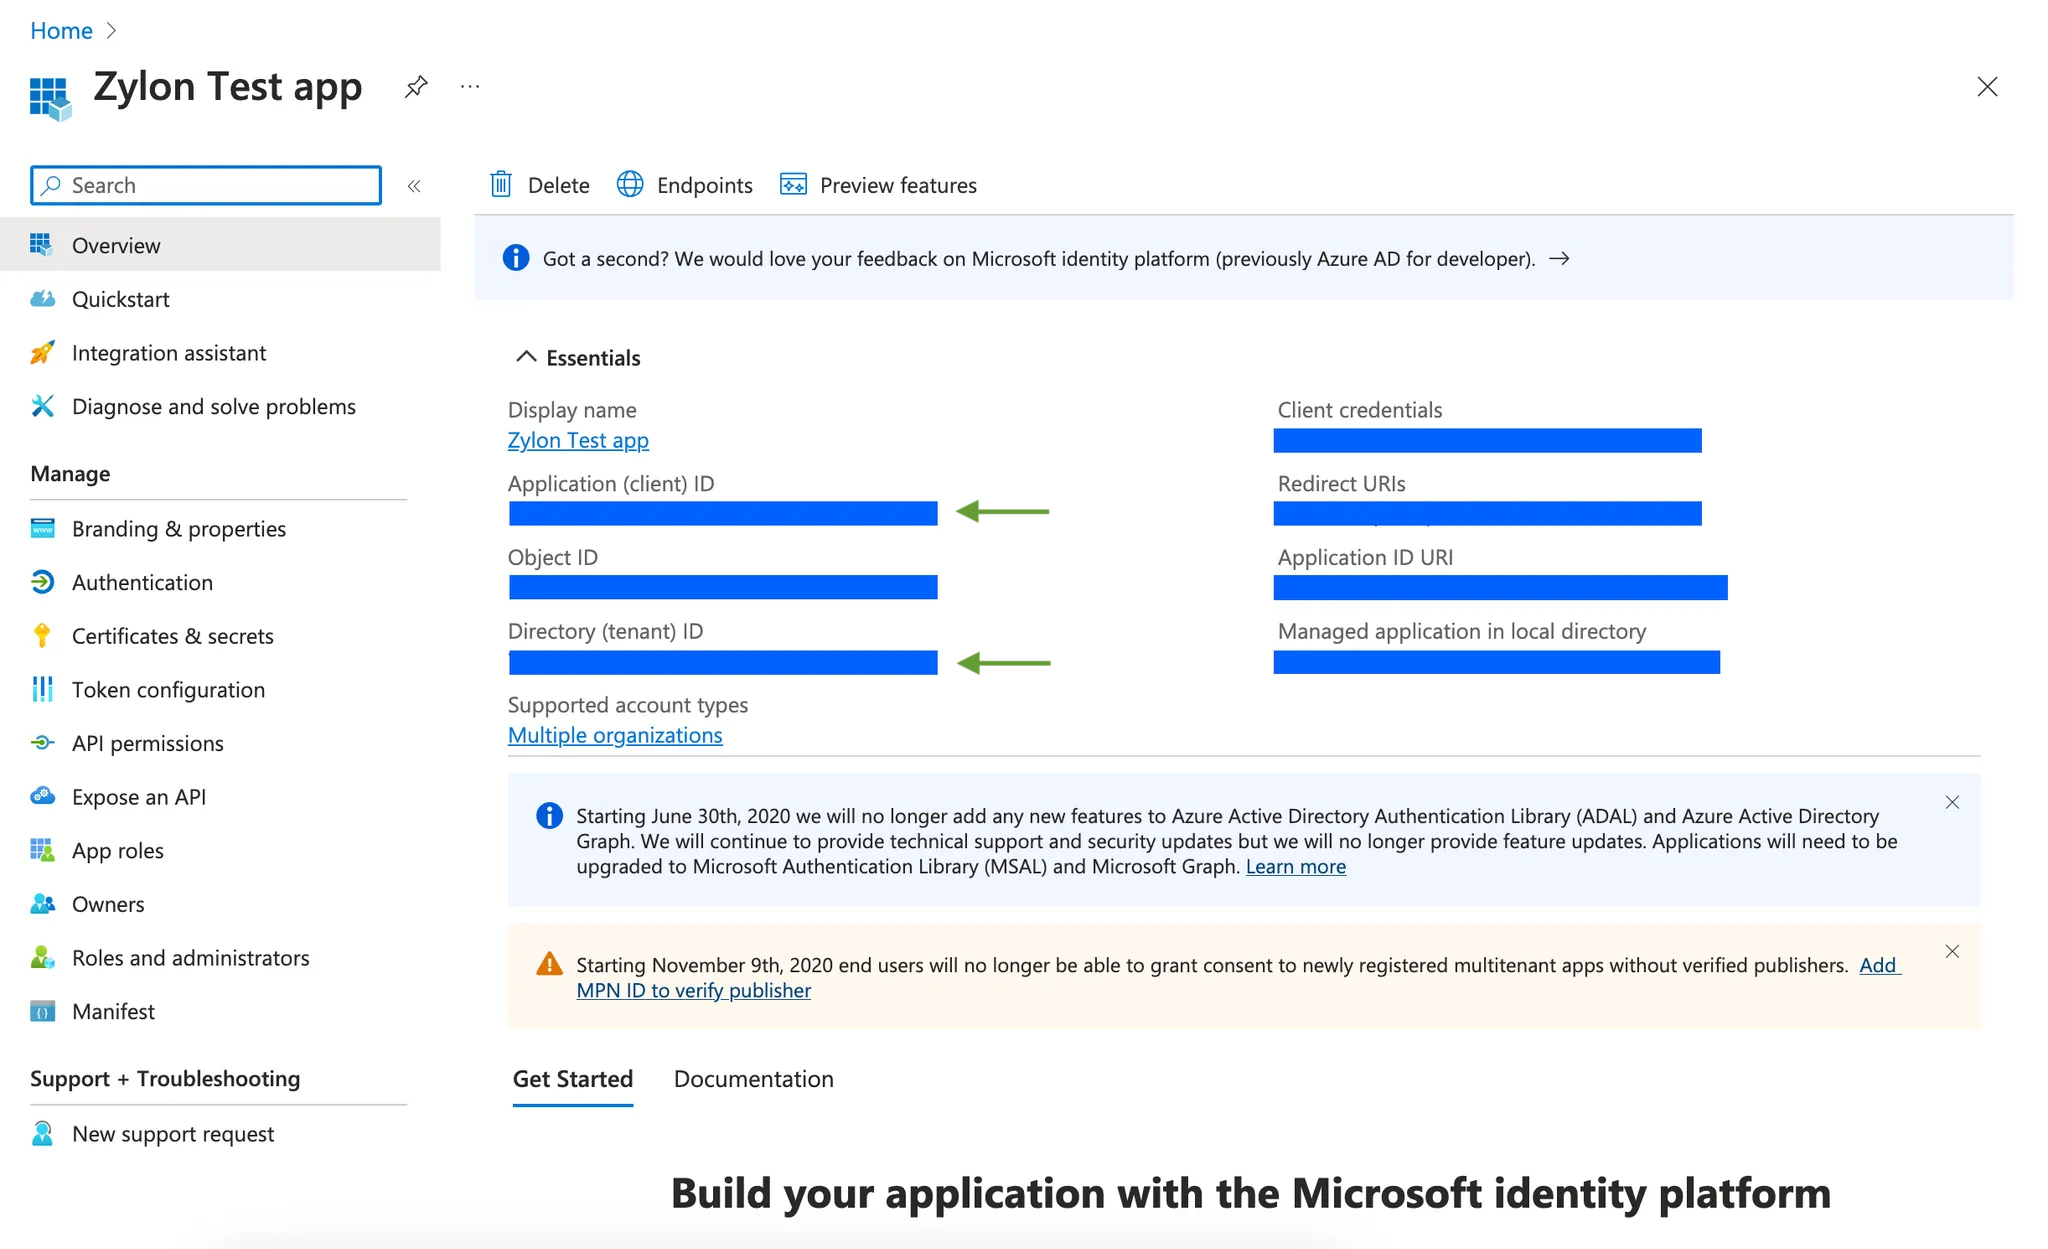
- Now that the app is created, note the
Application (client) IdandDirectory (tenant) idfrom theOverviewpage.
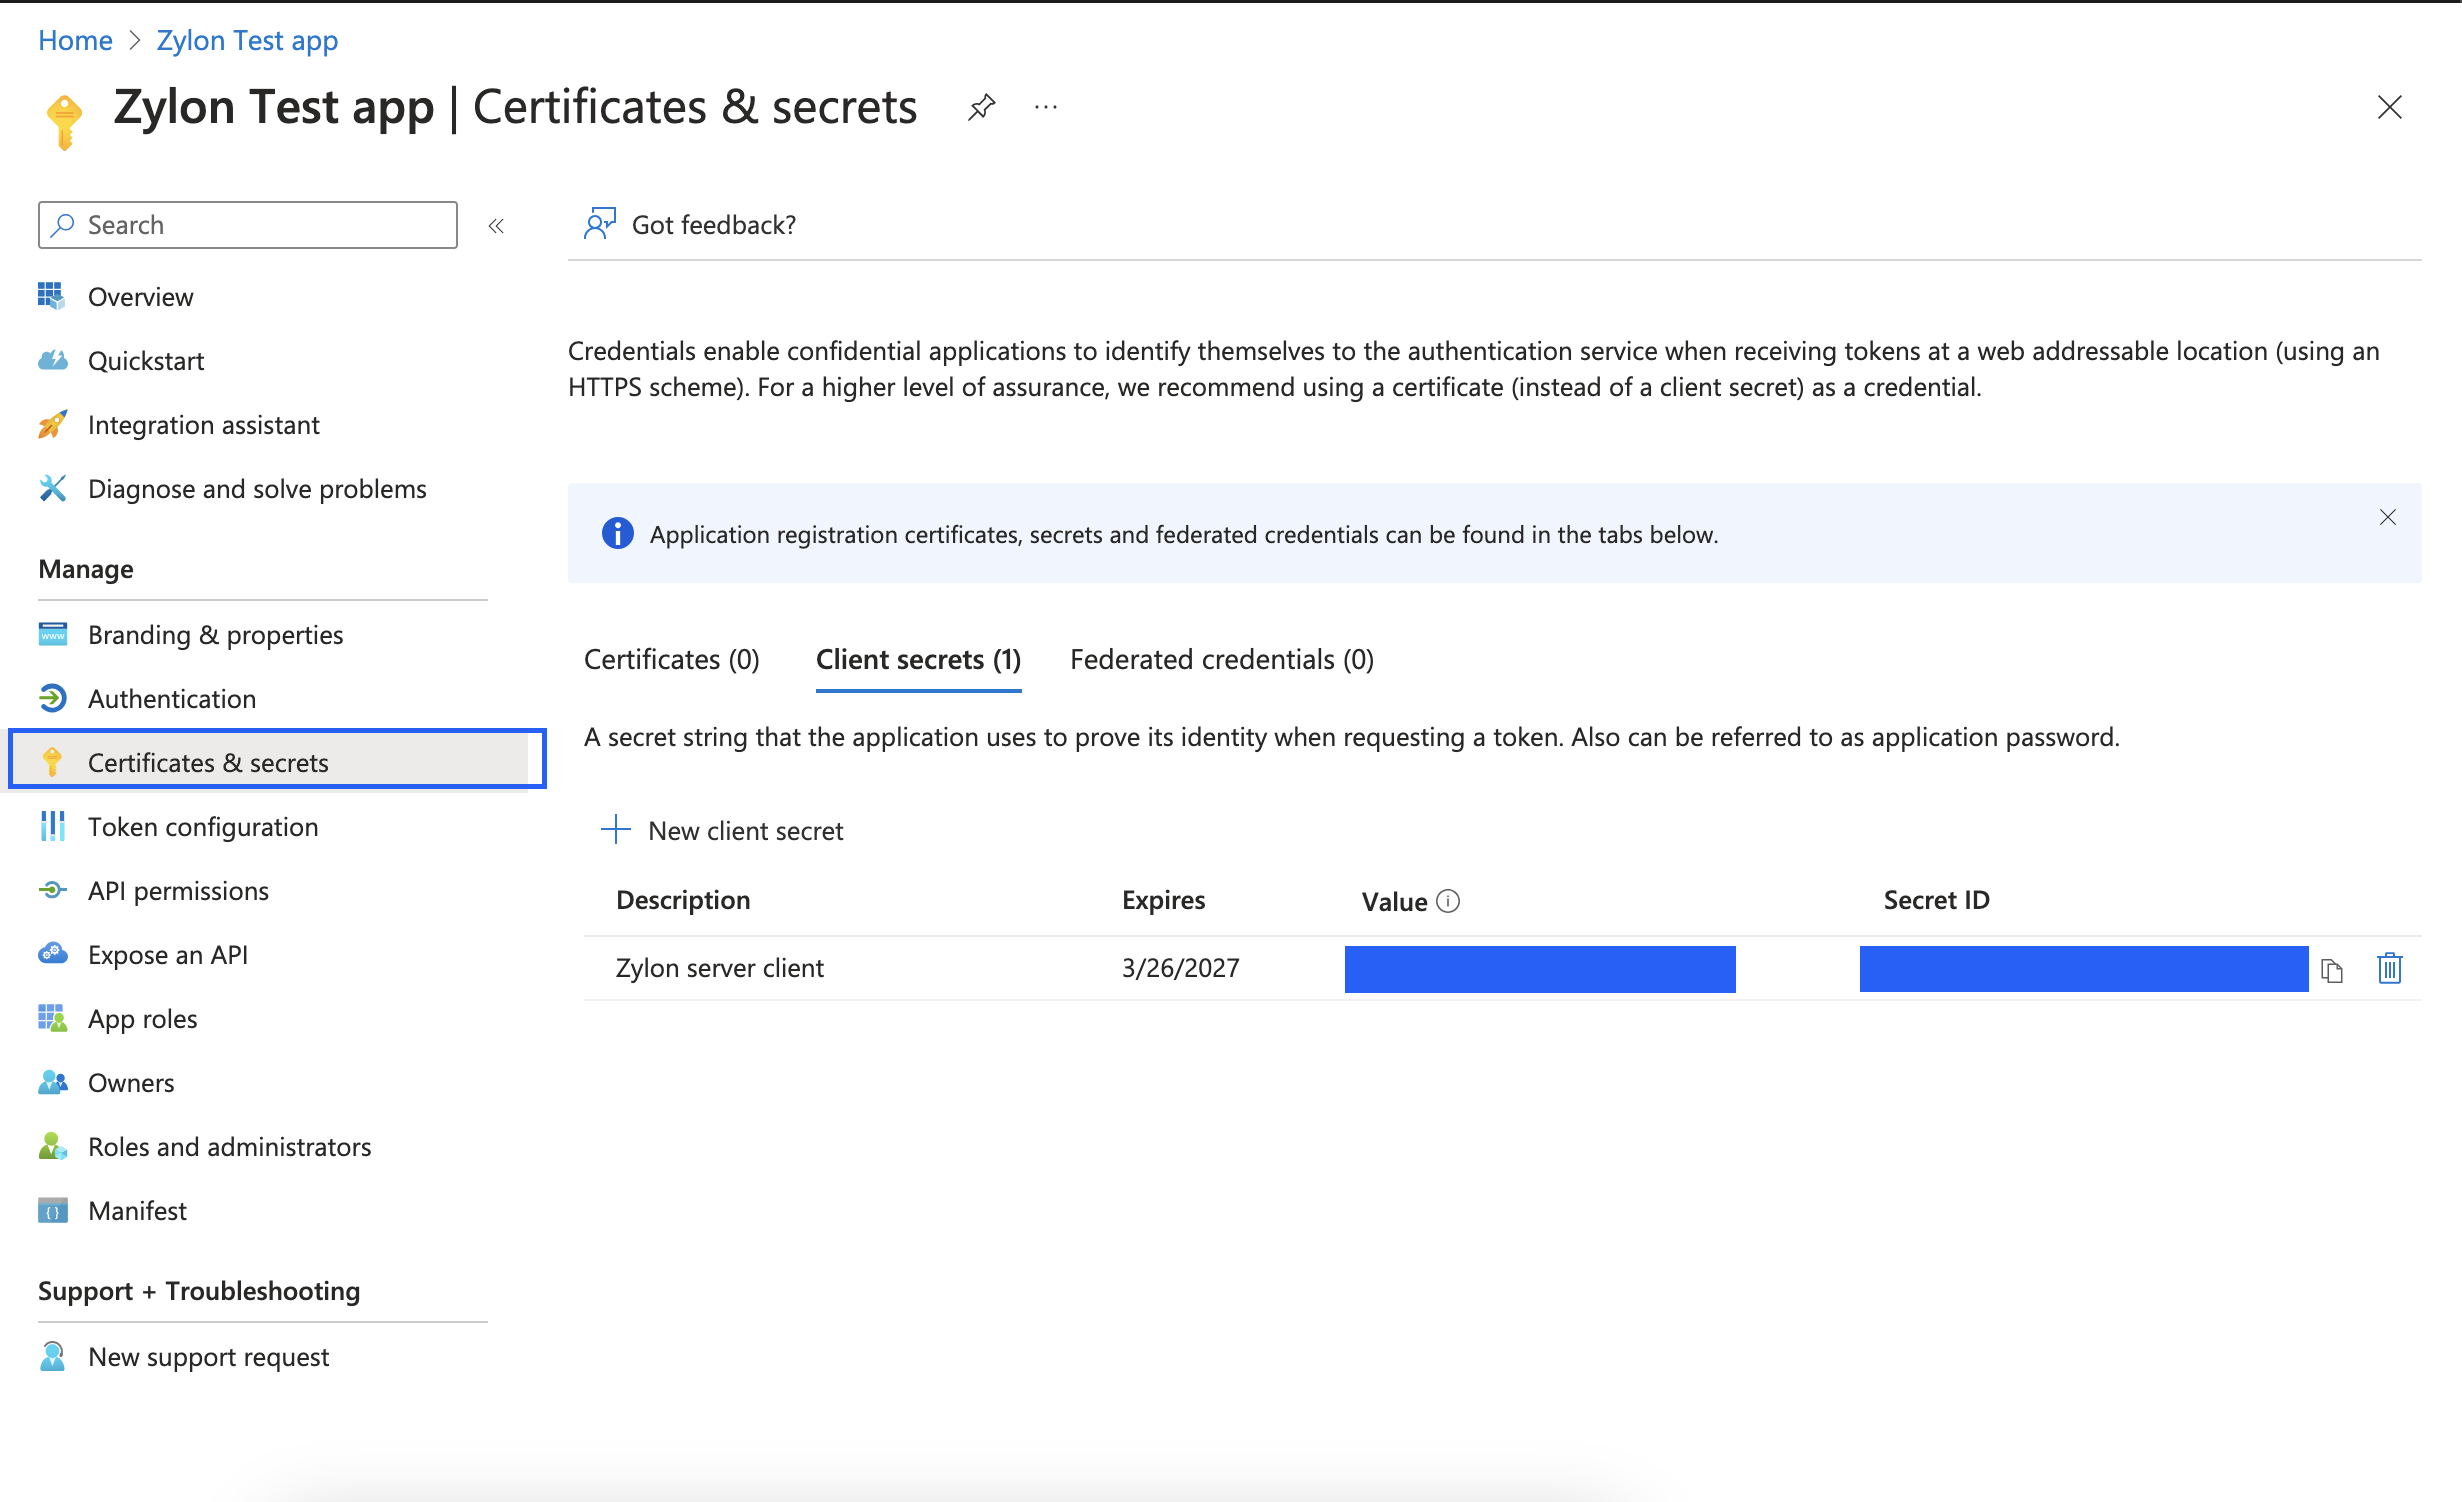
- Let’s create an application secret
Certificates & secrets → Click + New client secret → Add a description and expiration date(if you add a date coming up shortly you have to be aware your integration will stop working when the secret expires)
Copy the Client Secretvalue. The secret value will not be accesible later.
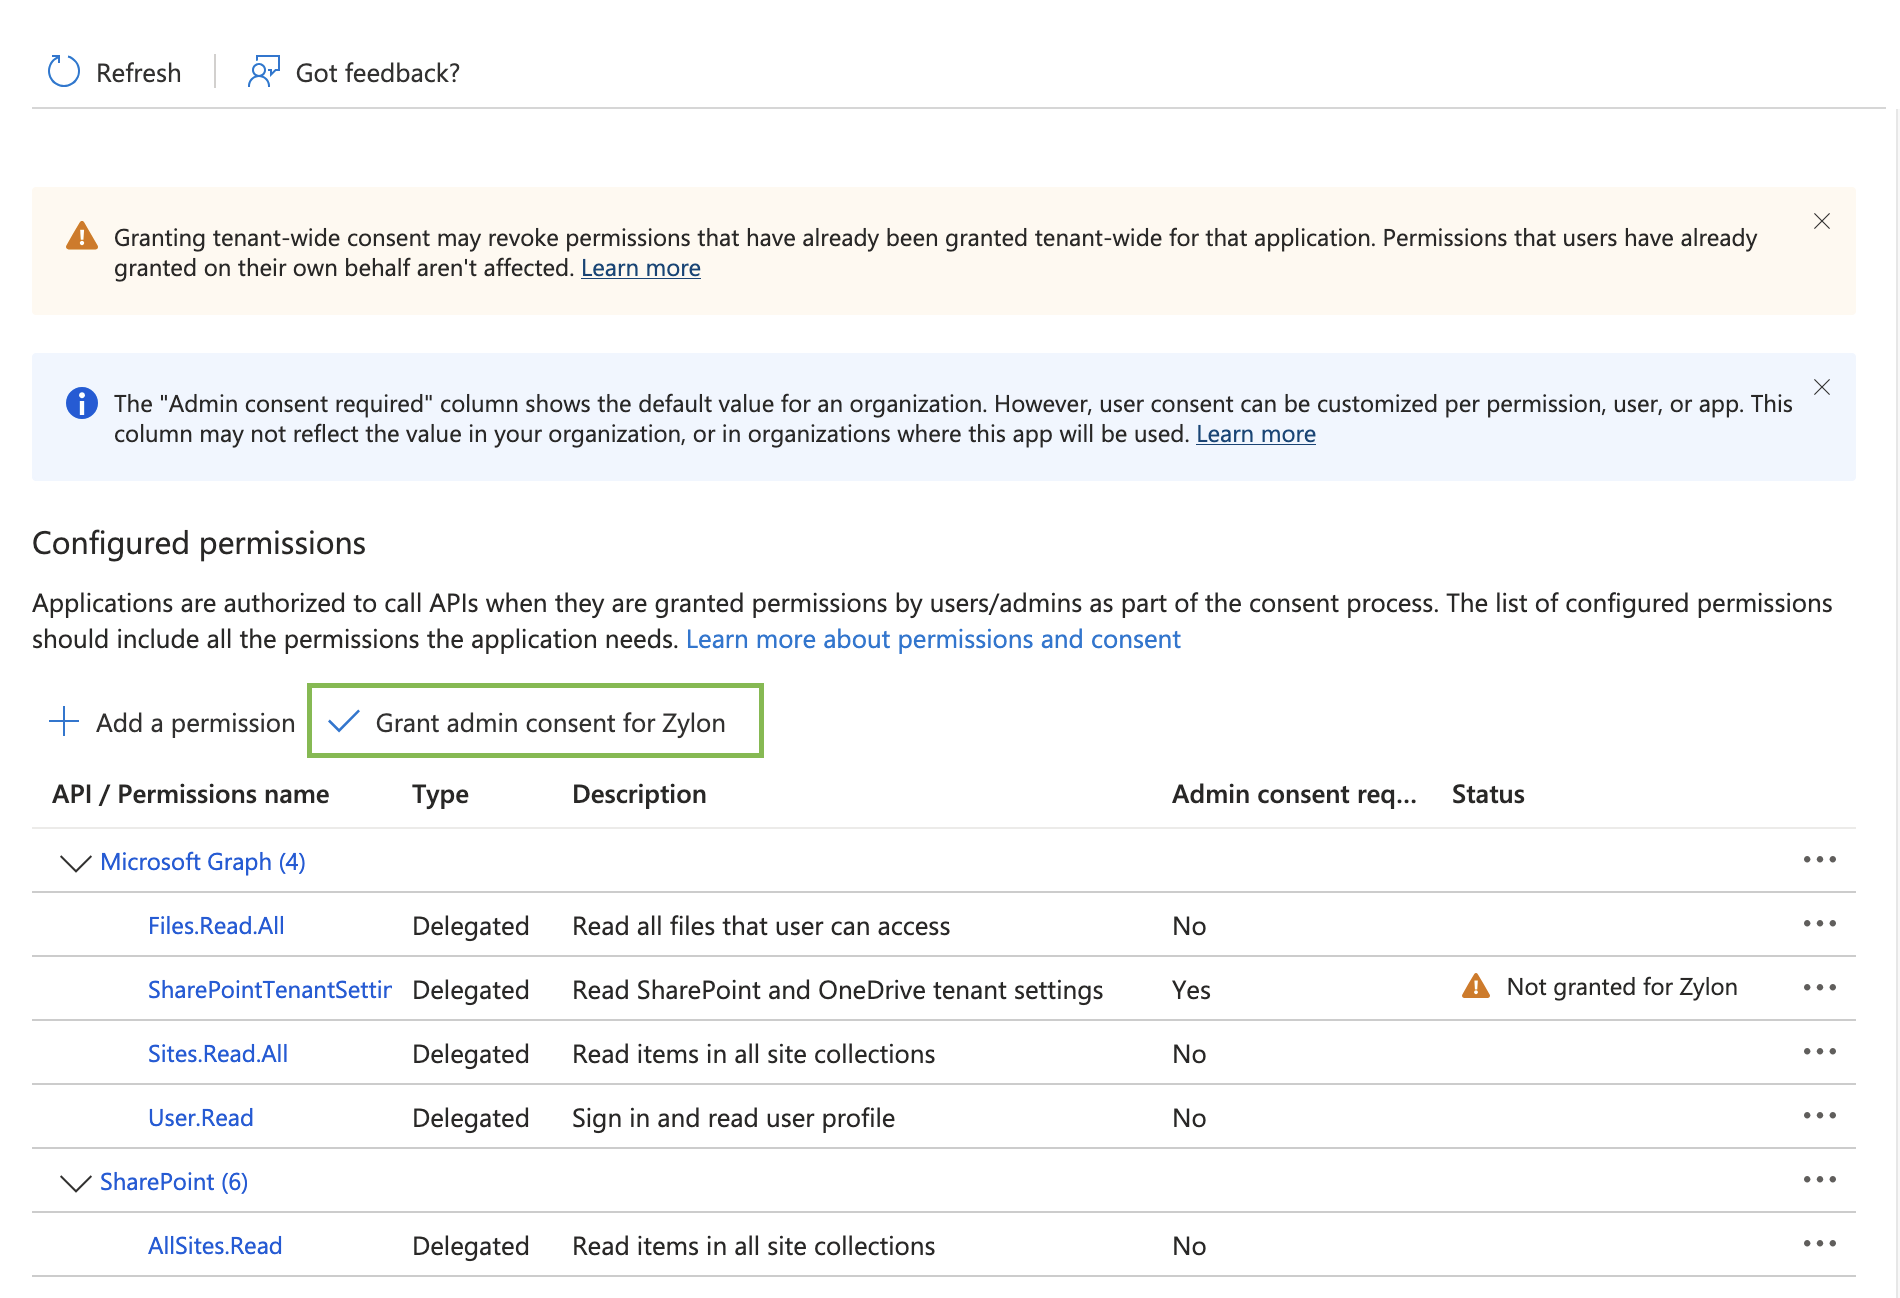
API Permissions → + Add a permission → Microsoft Graph → Delegated permissions and include the permissions below then click on Add permissions
Files.Read.AllOpenId permissions.offline_accessSharePointTenantSettings.Read.AllSites.Read.AllUser.Read
API Permissions → + Add a permission → SharePoint → Delegated permissions and include the permissions below then click on Add permissions
AllSites.ReadEnterpriseResource.ReadMyFiles.ReadProject.ReadSites.Search.AllUser.Read.All
Grant admin consent for [Your Org] and confirm by clicking Yes
Configure Zylon with your Azure AD app
With the values we have acquired in previous steps we will edit Zylon config file located in/etc/zylon/zylon-conf.yaml
Add the following snippet to the bottom of the file
- clientId → value generated on step 10
- clientSecret → value generated on step 11
- redirectUri → same value as step 4
- domain → Your sharepoint url
- tenantId → same value as step 10
- entrySite → (Optional) Default SharePoint site URL. See Configuring Default Opening Folder section below
- entryList → (Optional) Default list name, e.g., “Documents”. See Configuring Default Opening Folder section below
- entryFolder → (Optional) Default folder name. See Configuring Default Opening Folder section below
Save and close
/etc/zylon/zylon-conf.yamlfile
Configuring Default Opening Folder
You can configure a default opening folder for the SharePoint integration. This allows the integration to open directly to a specific folder when users access SharePoint through Zylon, improving the user experience by skipping navigation steps. The three optional fields control the entry point for the integration:entrySite: The absolute SharePoint site URL (works for both SharePoint and OneDrive)entryList: The list name within the site (e.g., “Documents” is the default for SharePoint)entryFolder: The folder name within the list
entrySite field, even for OneDrive. The path format should be like:
Example Configuration
If you want the integration to open by default to the “Defense and Security” folder in the Documents list for the useruser_example_onmicrosoft_com, you would configure:
Troubleshooting
I tried to upload files to the knowledge base but the SharePoint button is greyed out
Clear the browser cache and try again.When I click on Upload files -> From SharePoint the log in is not working
- Check that the
clientIdsecretIdare copy pasted correctly into Zylon config file - Check that
redirectUriis the same as step 4 and that your domain from sharepoint is right - Check that the
tenantIdbeing used matches the one under theOverviewpage of your application on Azure AD